Mechanical Pencil Feeds Too Much Lead

Mechanical pencils are the trusty tools of students, artists, architects, and engineers, but sometimes they need a little care and maintenance. One problem that pops up sooner or later with most well-used mechanical pencils is a lead jam. A lead jam happens when a bit of broken lead gets stuck in the pencil's tip or clutch mechanism, clogging it and keeping the lead from advancing correctly.
Some pencils—like the Pentel Orenz—have special instructions for clearing lead jams listed in their product descriptions on our website. For the vast majority of pencils, however, the techniques shown in this guide will work to clear most lead jams.
What You'll Need to Clear Up a Mechanical Pencil Lead Jam
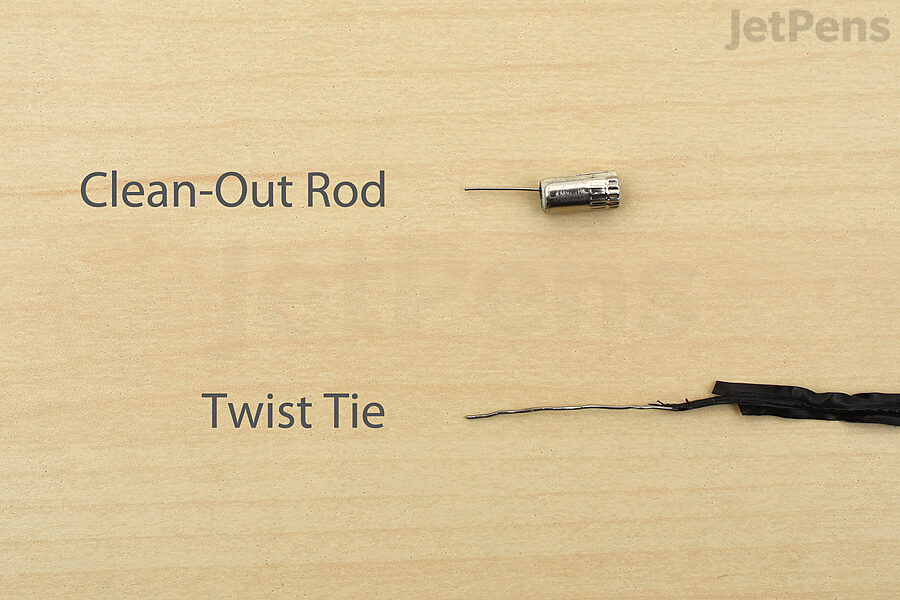
You will need some kind of cleaning wire to remove the broken lead.
You'll need something like a long, stiff wire that you can stick into the tip of the pencil. Some pencils come with a specialized wire called a "clean-out rod" mounted to the underside of the eraser. You can find all of our mechanical pencils with clean-out rods included here. Clean-out rods are generally interchangeable, so if any of your mechanical pencils have one, you can probably use it for all of them.
We also have a number of eraser refills that come with a clean-out rod included. Even if the eraser doesn't fit in any of your mechanical pencils, you can still keep it on hand for clearing lead jams.
If you don't have a mechanical pencil with a clean-out rod, see if you have any spare twist-ties—like the kind used to tie bread bags or garbage bags closed. If you strip off the paper or plastic of the twist-tie, the inner wire should be just the right size for clearing out a lead jam in a 0.5 mm or larger pencil.
Lastly, if all else fails you can try using a piece of lead. Please note however that we don't recommend trying this unless you have no other options. Leads are very fragile and can easily break off inside the pencil tip, making the jam even worse. Still, it is an option you can try as a last resort.
What to Do When Your Mechanical Pencil Lead Jams
Once you have your clean-out rod (improvised or otherwise) ready, start by removing any leads still in the pencil. This will ensure that they don't fall out or get in the way while you try to clear the jam.
We have two recommended techniques for clearing out lead jams. The first is more effective, but it can only be used on some pencils. If it doesn't work with your pencil, move on to the second technique.
Technique 1
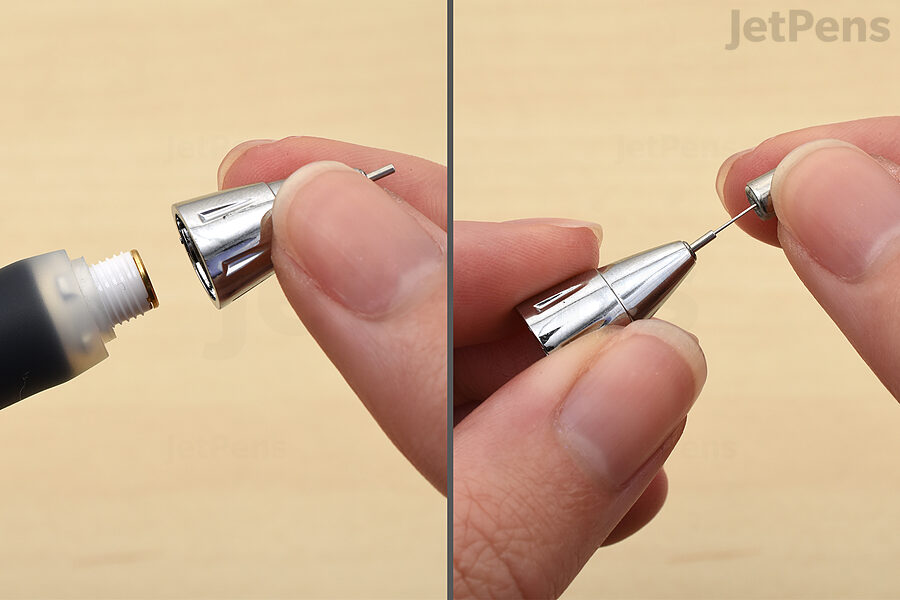
Unscrew and clean out the nose cone.
See if you can unscrew the nose cone of the pencil and if the lead sleeve is fixed to the nose cone as shown. If so, slide your clean-out rod through the tip of the lead sleeve and nose cone to push out any bits of broken lead.

Hold open the jaws of the exposed clutch mechanism.
Next, see if the pencil's clutch mechanism has been exposed by removing the nose cone. The mechanism generally includes a set of prongs (or "jaws") held together by a metal or plastic ring. In engineering terms, this type of clutch mechanism is called a "chuck." If your pencil has this kind of clutch mechanism, hold down the pencil's push button and use a fingernail to slide the ring back from the tips of the jaws.

Clean out the inside of the clutch mechanism.
This will allow the jaws to separate and let any bits of broken lead trapped inside fall out. You can also use your clean-out rod to probe inside the mechanism for any hidden bits of broken lead.
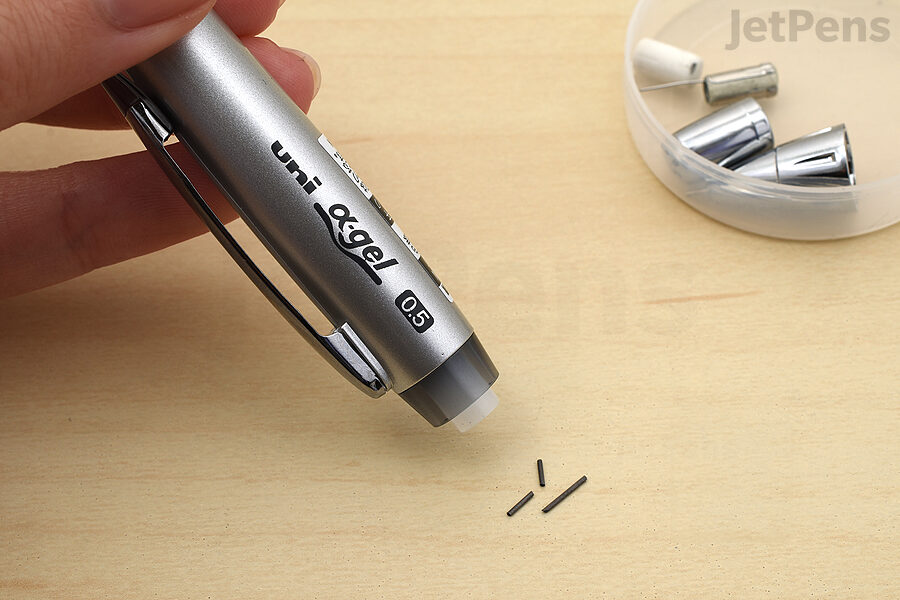
Dump out any bits of broken lead from the storage tube.
Once you're done, open the pencil's lead storage chamber and shake out any bits of broken lead that you dislodged. We don't want them to fall back into the tip and jam it again the next time you use the pencil.

Add a fresh piece of lead to the pencil.
Screw the nose cone back into place, add a lead to the pencil, and try using the push button to extend the lead. If it works, congratulations! You have successfully cleared the lead jam.
Technique 2
If your pencil doesn't have the right kind of nose cone or clutch mechanism to use the first technique, use this one instead.
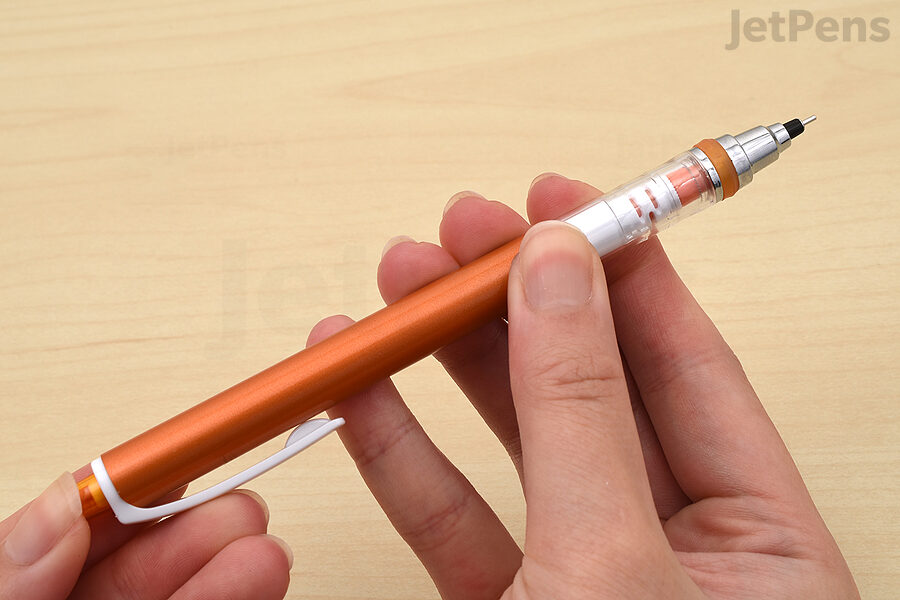
Hold the pencil tip up and press down the push button.
Turn the pencil tip up and hold down the push button. This will open up the clutch mechanism inside the tip and make it easier to clean.
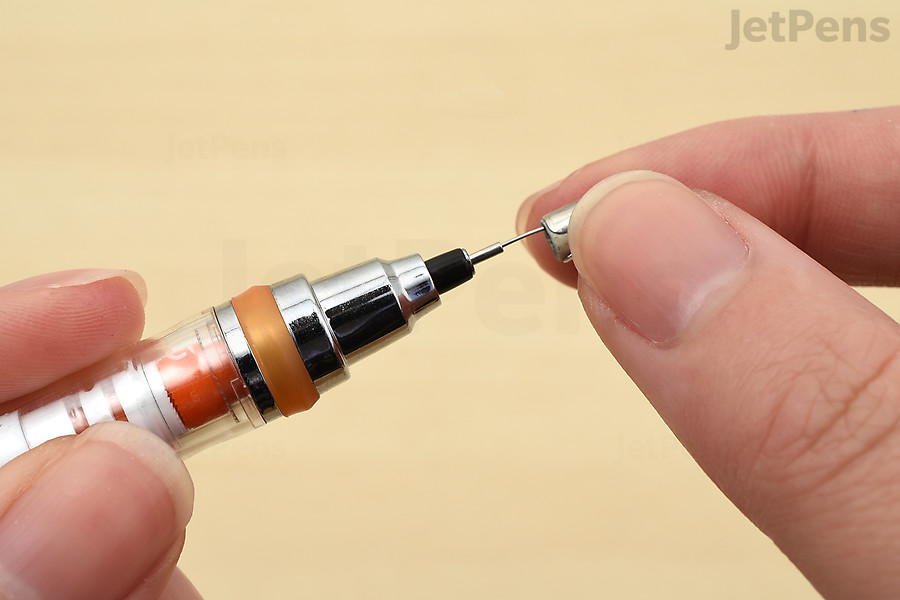
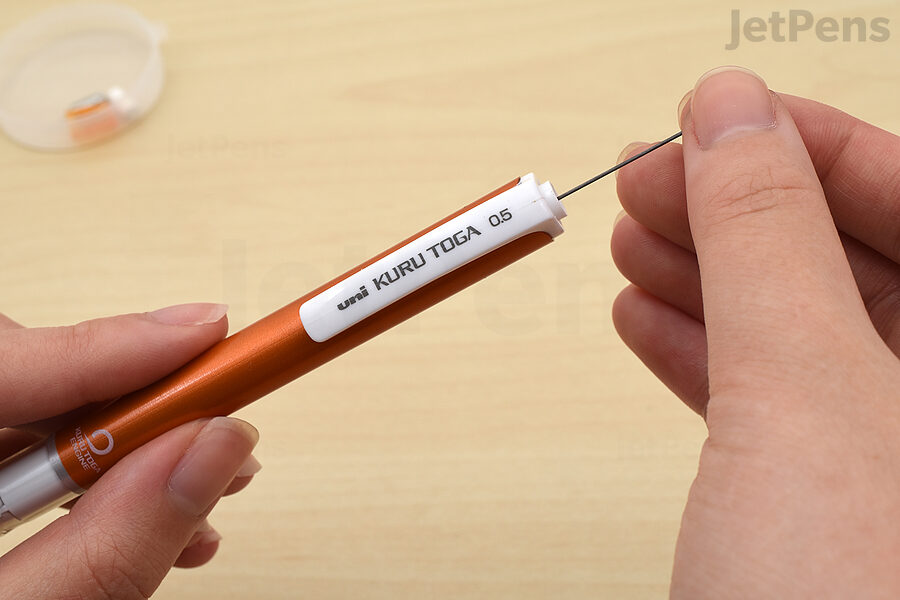
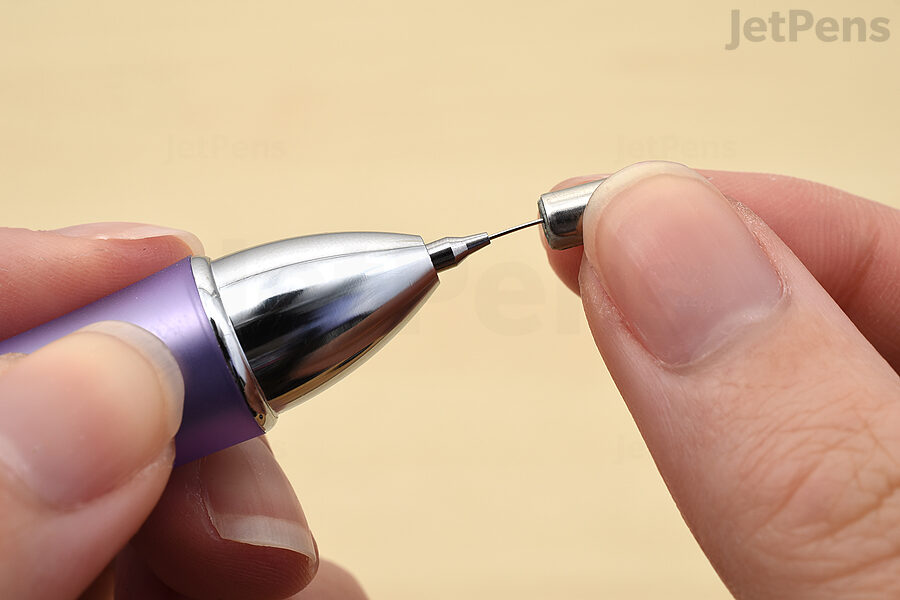
Use the clean-out rod in the tip.
Insert the clean-out rod into the tip. Slide it in and out of the tip several times, moving it around as much as you can to dislodge any bits of broken lead hiding inside the tip.

Dump out any bits of broken lead from the storage tube.
While still holding the pencil tip up, open up the pencil's lead storage chamber and shake out any bits of broken lead that you dislodged. We don't want them to fall back into the tip and jam it again the next time you use the pencil.
Add a fresh piece of lead to the pencil.
Add a lead to the pencil and try using the push button to extend the lead. If it works, you've cleared the lead jam!
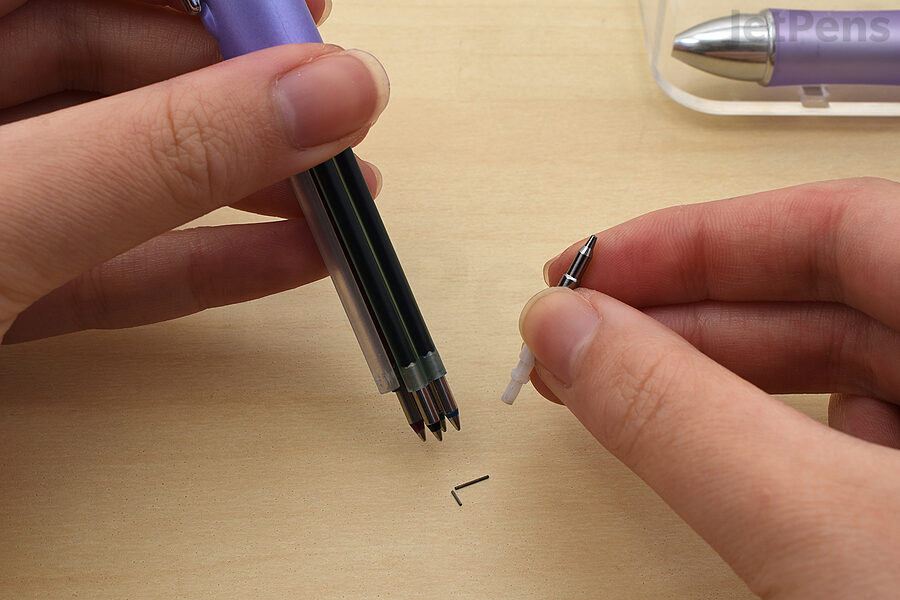
Clearing Lead Jams in Multi Pens
When a lead jam occurs in a multi pen, try removing all but one of the leads from the lead storage tube. Most multi pens can safely hold 2–3 leads at once, but sometimes even two leads can get in each other's way and cause a jam.
If removing extra leads doesn't help, try the following variation of Technique 2.
Hold the multi pen tip up and press down the push button for the pencil component.
Select the pencil component, turn the multi pen tip up, and hold down the button that extends the lead. This will open up the clutch mechanism inside the tip and make it easier to clean.
Use the clean-out rod in the tip.
Insert the clean-out rod into the tip of the pencil component. Slide it in and out of the tip several times, moving it around as much as you can to dislodge any bits of broken lead hiding inside the tip.
Dump out any bits of broken lead from the storage tube.
Open the multi pen, remove the pencil component, and pour out any bits of broken lead that were pushed back into the lead storage tube. You can find instructions on how to remove a multi pen pencil component in our guide here.
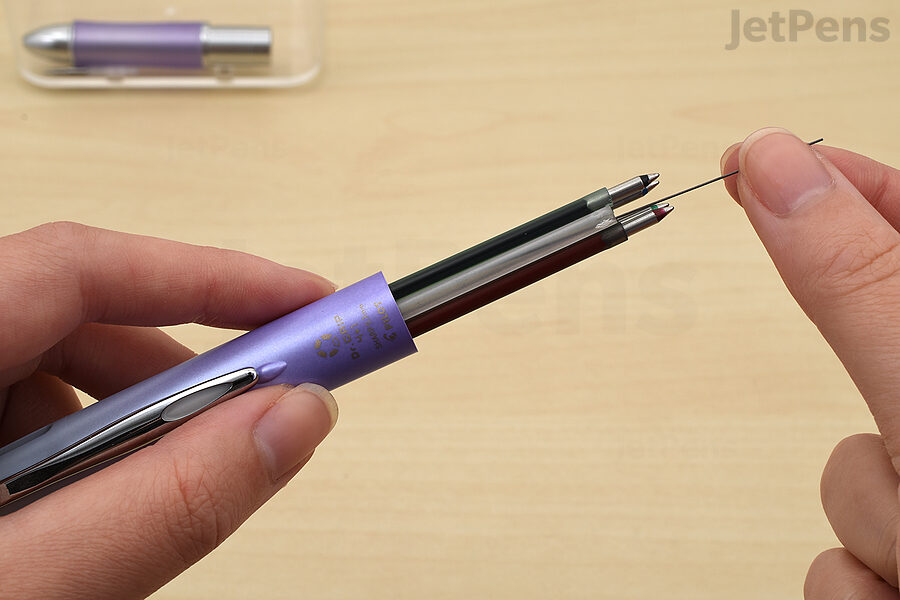
Add a fresh piece of lead to the pencil.
Add a lead to the pencil component, reinstall the component, and try extending the lead. If it works, you've cleared the lead jam!
Our writers draw on their personal expertise, consult our in-house subject matter experts, and do extensive research to make our guides as accurate and comprehensive as possible. We then test every finding that makes it through the research stage. Only the techniques and tools whose performance we personally confirm make it into our guides as recommendations.
Final Thoughts
Hopefully, your mechanical pencil is now working like new again. We've found that the two techniques covered in this guide will work to clear most lead jams. Of course, feel free to contact us for help if any pencil you order from us doesn't work when you receive it and these techniques don't help.
For more information on using mechanical pencils and troubleshooting common problems, be sure to check out our Beginner's Guide to Mechanical Pencils. And if you'd like some advice on your next mechanical pencil purchase, take a look out our guide to choosing the best mechanical pencil.
Source: https://www.jetpens.com/blog/How-to-Clear-a-Mechanical-Pencil-Lead-Jam/pt/311